
Table of Contents
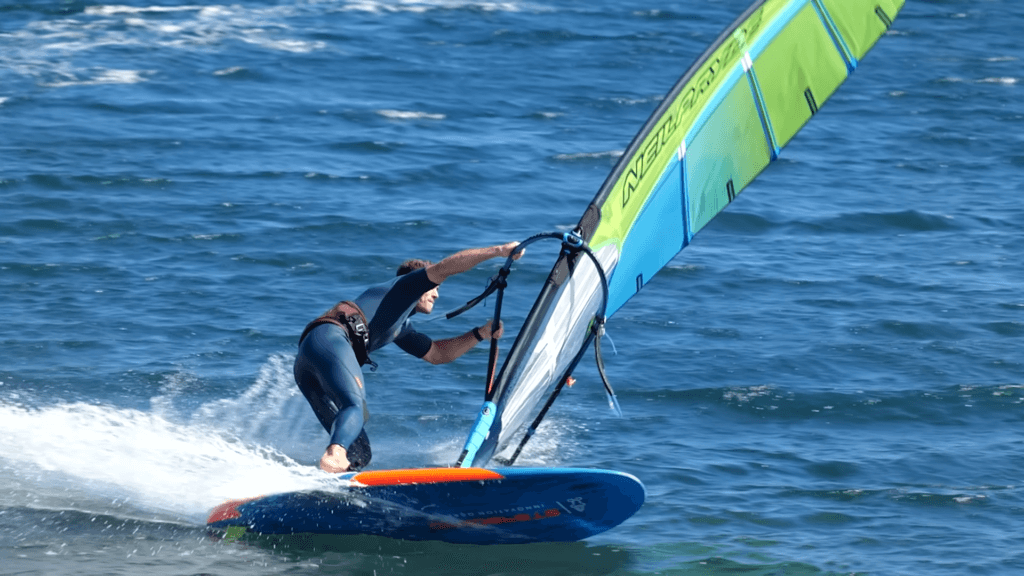
Welcome to the exhilarating world of windsurfing, where the dance between wind and waves becomes an art form. Amidst the rush of the sea and the rustle of the sail, one maneuver stands out—the graceful carve jibe. If you’ve ever marveled at windsurfers effortlessly slicing through the water, changing direction with finesse, you’re in for a treat.
In this guide, we’ll unravel the secrets of the carve jibe, turning what might seem like a complex move into an attainable skill. Whether you’re dipping your toes into windsurfing or seeking to elevate your technique, our step-by-step journey will provide insights and tips to make your carve jibes both fluid and stylish.
So, grab your board, ensure your sail is set, and join us as we navigate through the essential steps to help you master the art of carving jibes. Let the wind be your guide as we break down each stage, making your windsurfing experience both thrilling and fulfilling.
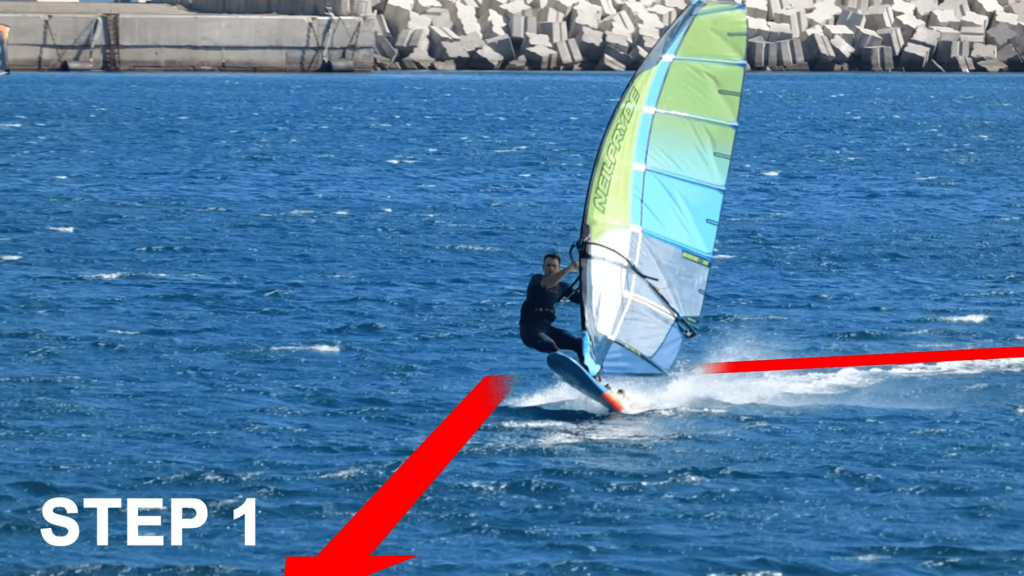
Step 1: Sail Downwind and Unhook
Picture yourself on the windsurfing stage, ready for the opening move that’s both liberating and thrilling. Begin by sailing slightly downwind, letting the wind guide your board effortlessly. It’s like catching the perfect breeze, setting the scene for the exhilarating dance on the water.
As you glide downwind, feel the wind’s embrace, and in this moment of fluidity, unhook yourself. It’s not just a physical release; it’s a declaration of freedom, allowing you to navigate with more spontaneity. The board becomes an extension of your movements, and you become one with the wind.
This tandem action of sailing downwind and unhooking marks the beginning of your windsurfing journey. It’s not just about the mechanics; it’s about the poetry of movement and the freedom to explore. So, ride the wind’s wave, unhook, and let the windsurfing adventure unfold with the serenity of a dancer in perfect sync with the elements.
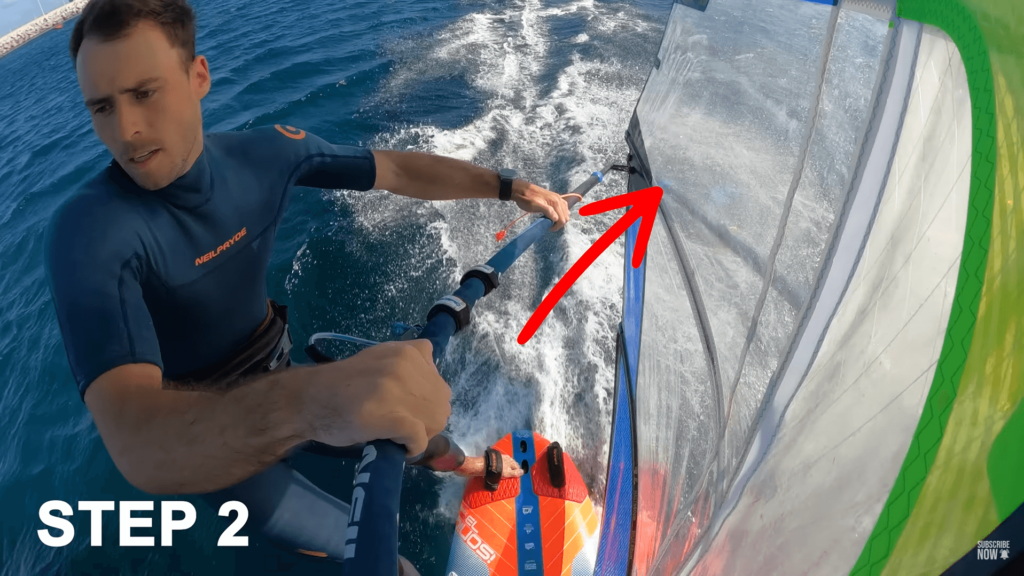
Step 2: Slide Your Hand Down the Boom and Shifting Your Foot
Now that you’ve got a feel for the wind and your board, let’s add another layer to your windsurfing dance. Imagine your backhand as the lead in this partnership, guiding the way for a seamless turn.
Ease your backhand down the boom, like a smooth transition in a well-choreographed routine. This subtle adjustment is your way of inviting balance and control into your windsurfing performance. Meanwhile, shift your foot out of the backstrap and gracefully place it on the other side of the board. Think of it as a step in your dance, ensuring your movements are in harmony with the wind.
As your backhand finds its new position and your foot gracefully relocates, you’re setting the stage for a more intricate, yet effortless, windsurfing experience. It’s like adding a spin to your dance, creating a symphony of movement between you and the board. So, lower that backhand, shift that foot, and let the windsurfing rhythm carry you across the waves.
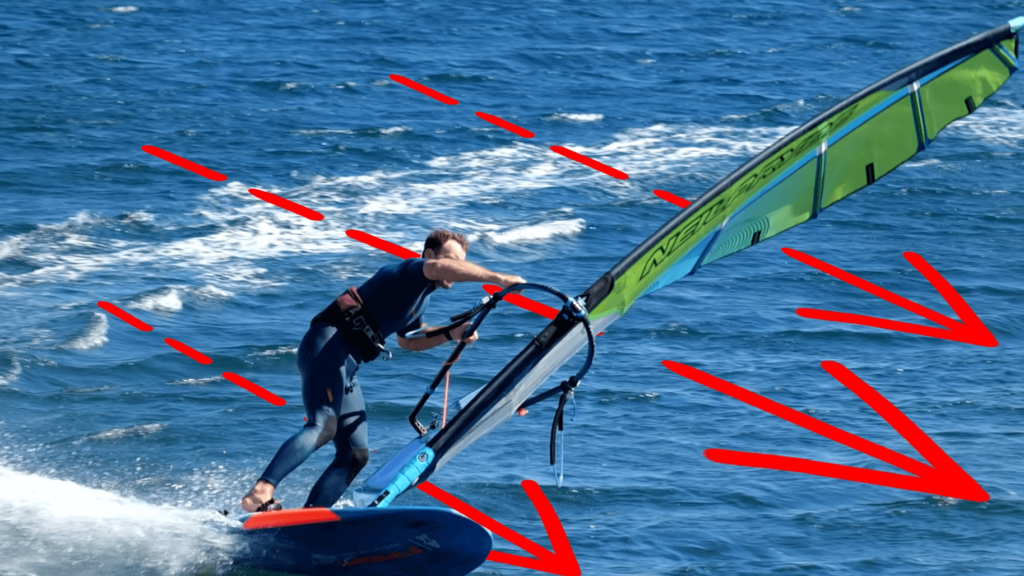
Step 3: Carving and Closing the Sail
Now that you’ve established a solid foundation with your hand and foot positioning, it’s time to dive into the heart of windsurfing’s artistry – carving. Imagine it as orchestrating a graceful turn on the water, akin to sculpting your path with the wind as your guide.
As you lean into the turn, direct your attention to putting pressure on the rail of your board. This isn’t about brute force but a subtle shift in weight, creating a synergy between you, the board, and the water. Simultaneously, bring the sail closer to you, closing it in. Think of it as embracing the wind, allowing you to harness its power efficiently.
Now, here’s the trick: keep your eyes on where you want to go. It might sound simple, but focusing on your destination helps align your body and board, ensuring a smooth and purposeful carve. The combination of pressure on the rail, a snug sail, and an unwavering gaze sets the stage for a fluid and controlled maneuver. So, lean in, feel the wind respond, and let the art of carving unfold beneath your feet.
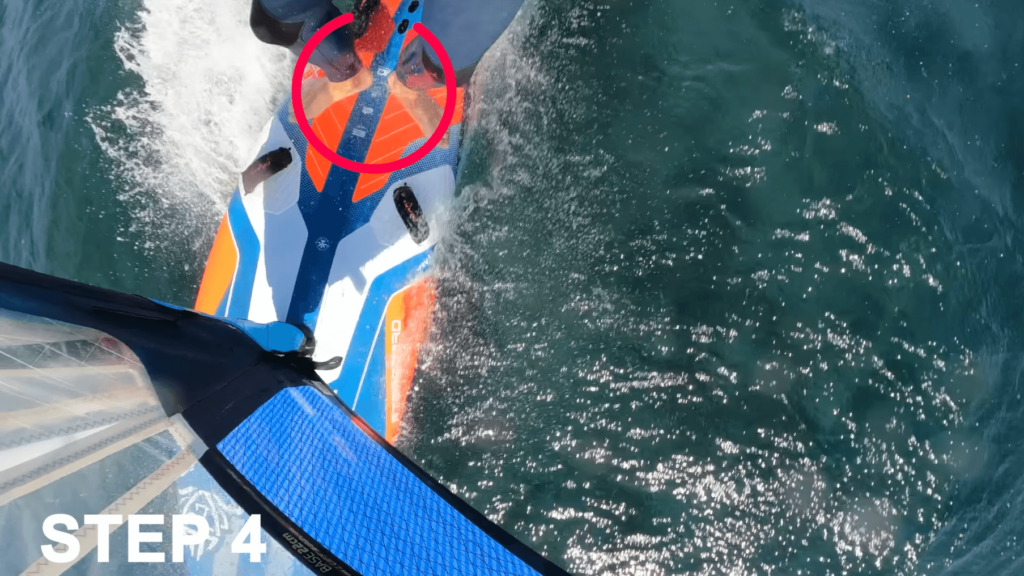
Step 4: Switching Feet and Maintaining Constant Carve
As you ride the exhilarating wave of carving, it’s time to introduce a dynamic move that adds versatility to your windsurfing repertoire – switching feet. Imagine it as a dance step, a seamless transition that keeps the rhythm of your ride alive.
With the carve in full swing, gently switch your feet. It’s not about a hurried shuffle but a coordinated move that maintains the constant flow of your carve. This subtle foot exchange allows you to distribute your weight evenly, ensuring stability and control throughout the maneuver.
The key here is consistency. Keep that carve constant, maintaining the harmonious connection between your body and the board. Think of it as a continuous brushstroke on a canvas of wind and water. By blending the switch of your feet into the carve, you’ll discover a newfound fluidity that enhances your windsurfing experience. So, let the dance continue – switch those feet, and revel in the artistry of constant carving.
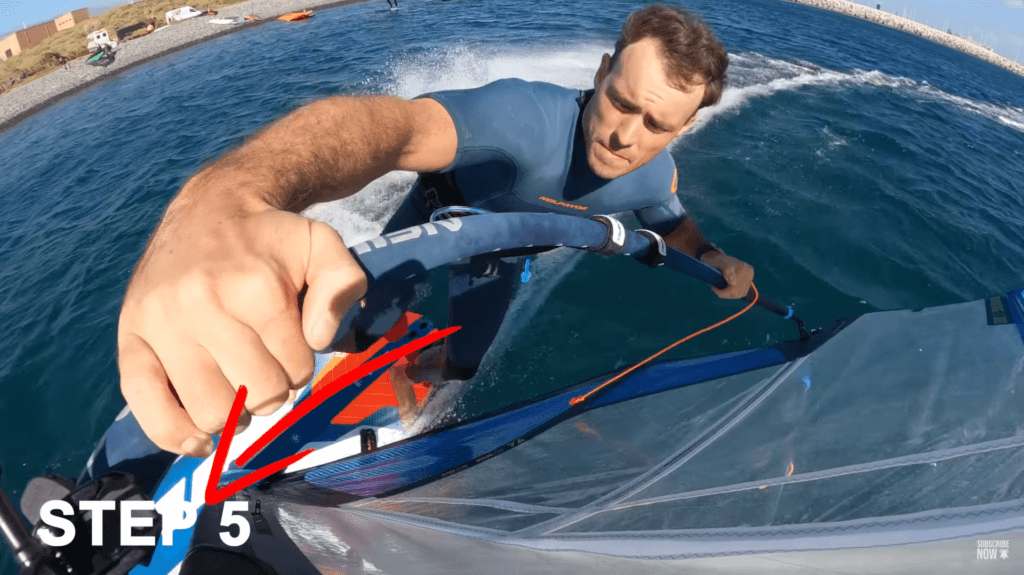
Step 5: Slight Front Hand Adjustment and Releasing the Back Hand
Now that you’ve mastered the art of constant carving, let’s refine your technique by focusing on your hand positioning. It’s like tuning an instrument for a more harmonious melody as you glide across the water.
Start by making a subtle adjustment to your front hand, bringing it slightly closer to the mast. This shift might feel small, but it plays a pivotal role in maintaining control and balance during your windsurfing adventure.
As you fine-tune your front hand, it’s time to release the back hand. Picture it as releasing the sail to the wind’s embrace. By doing so, you allow your board to respond more freely to the changing winds, creating a dynamic equilibrium between your movements and the natural forces around you.
This delicate interplay of adjusting the front hand and releasing the back hand adds a layer of finesse to your ride, enhancing your ability to navigate the waters with grace. So, make those nuanced adjustments, let go, and feel the wind carry you into the next phase of your windsurfing journey.
Step 6: Compelting The Jibe
In the grand finale of our windsurfing carving tutorial, we’re diving into a move that adds a touch of flair to your ride – grabbing across the boom. It’s like reaching out for the perfect note in a musical composition, adding a personal touch to your windsurfing performance.
Extend your hand across the boom, creating a connection that enhances your control and stability. Picture it as a handshake with the wind, solidifying your partnership for the remainder of your journey.
As you make this move, smoothly reposition your hand on the new side of the boom. This deliberate shift ensures that your grip remains secure, allowing you to steer and adjust the sail with ease.
Now, with your hand gracefully settled on the new side, sail away confidently. Feel the wind in your sail and the water beneath your board as you navigate the waves. This final move, like the closing chord of a melody, completes the symphony of carving, leaving you with a sense of accomplishment and the freedom to explore the windsurfing realm with newfound confidence. So, grab, reposition, and set sail into the exciting horizons that await you on the windsurfing canvas.

Conclusion | How to Carve Jibe
In closing, we hope this guide has ignited your passion for windsurfing, offering a roadmap to finesse and mastery in the exhilarating realm of carve jibes. As the wind becomes your dance partner and the waves your canvas, each step outlined is an invitation to unlock the full potential of your windsurfing journey.
Remember, these steps aren’t just about technicalities – they’re a celebration of the synergy between rider and wind, a dance that evolves with each carve. With practice, you’ll find yourself gliding through the water with newfound grace and control.
A heartfelt thank you to Nico Prien for sharing his expertise and allowing us to feature images from his captivating video and for more tips you need to watch his video. His passion for windsurfing is truly inspiring, and we encourage you to explore his full video for an immersive windsurfing experience.
May the wind always be at your back as you embark on your windsurfing adventures. Happy carving!